Plant Activities Using Paper Materials

eatbreathegarden_SMorgan

With therapeutic horticulture professionals in mind, here are some ideas on how to do plant- and nature-oriented activities using paper materials. This may be helpful when supplementing activities that utilize natural materials without potting media or live plants or looking for budget friendly alternatives to activity materials. The information in this blog post was featured in the fall 2020 issue of the Nova Scotia Horticulture for Health newsletter, “Digging In.” Post written with input by Lesley Fleming, HTR.

Therapeutic horticulturists use a variety of materials for plant-based programs. Paper, a plant product, can be key components or supplemental accessory for hands-on activities.

eatbreathegarden_SMorgan

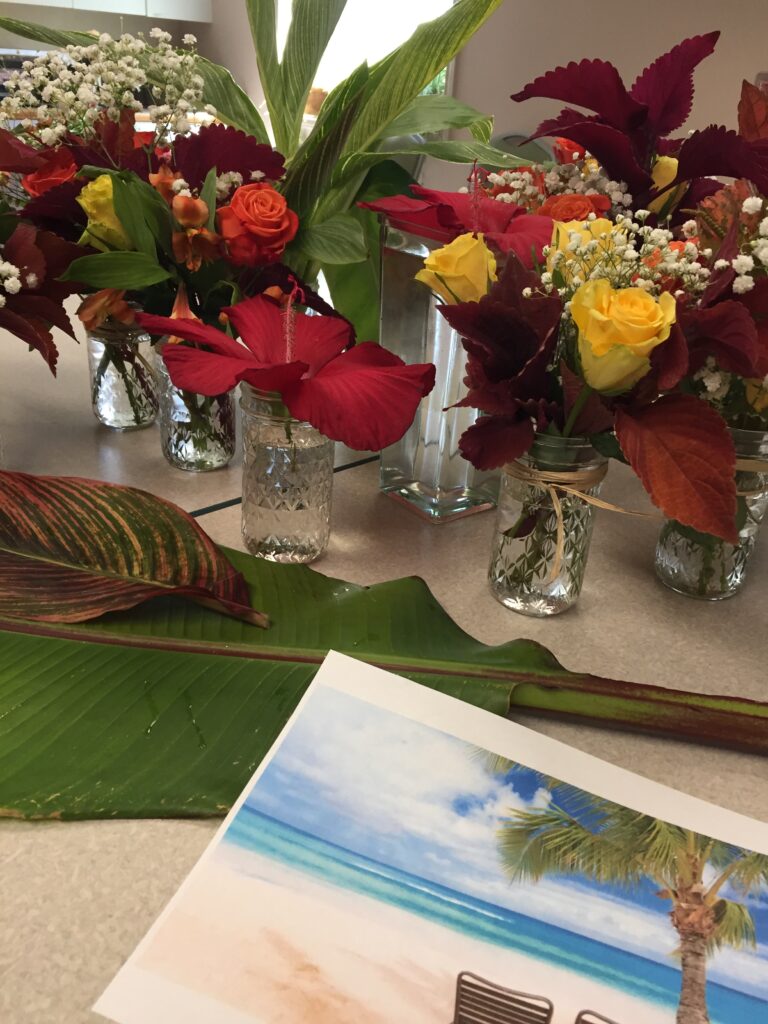
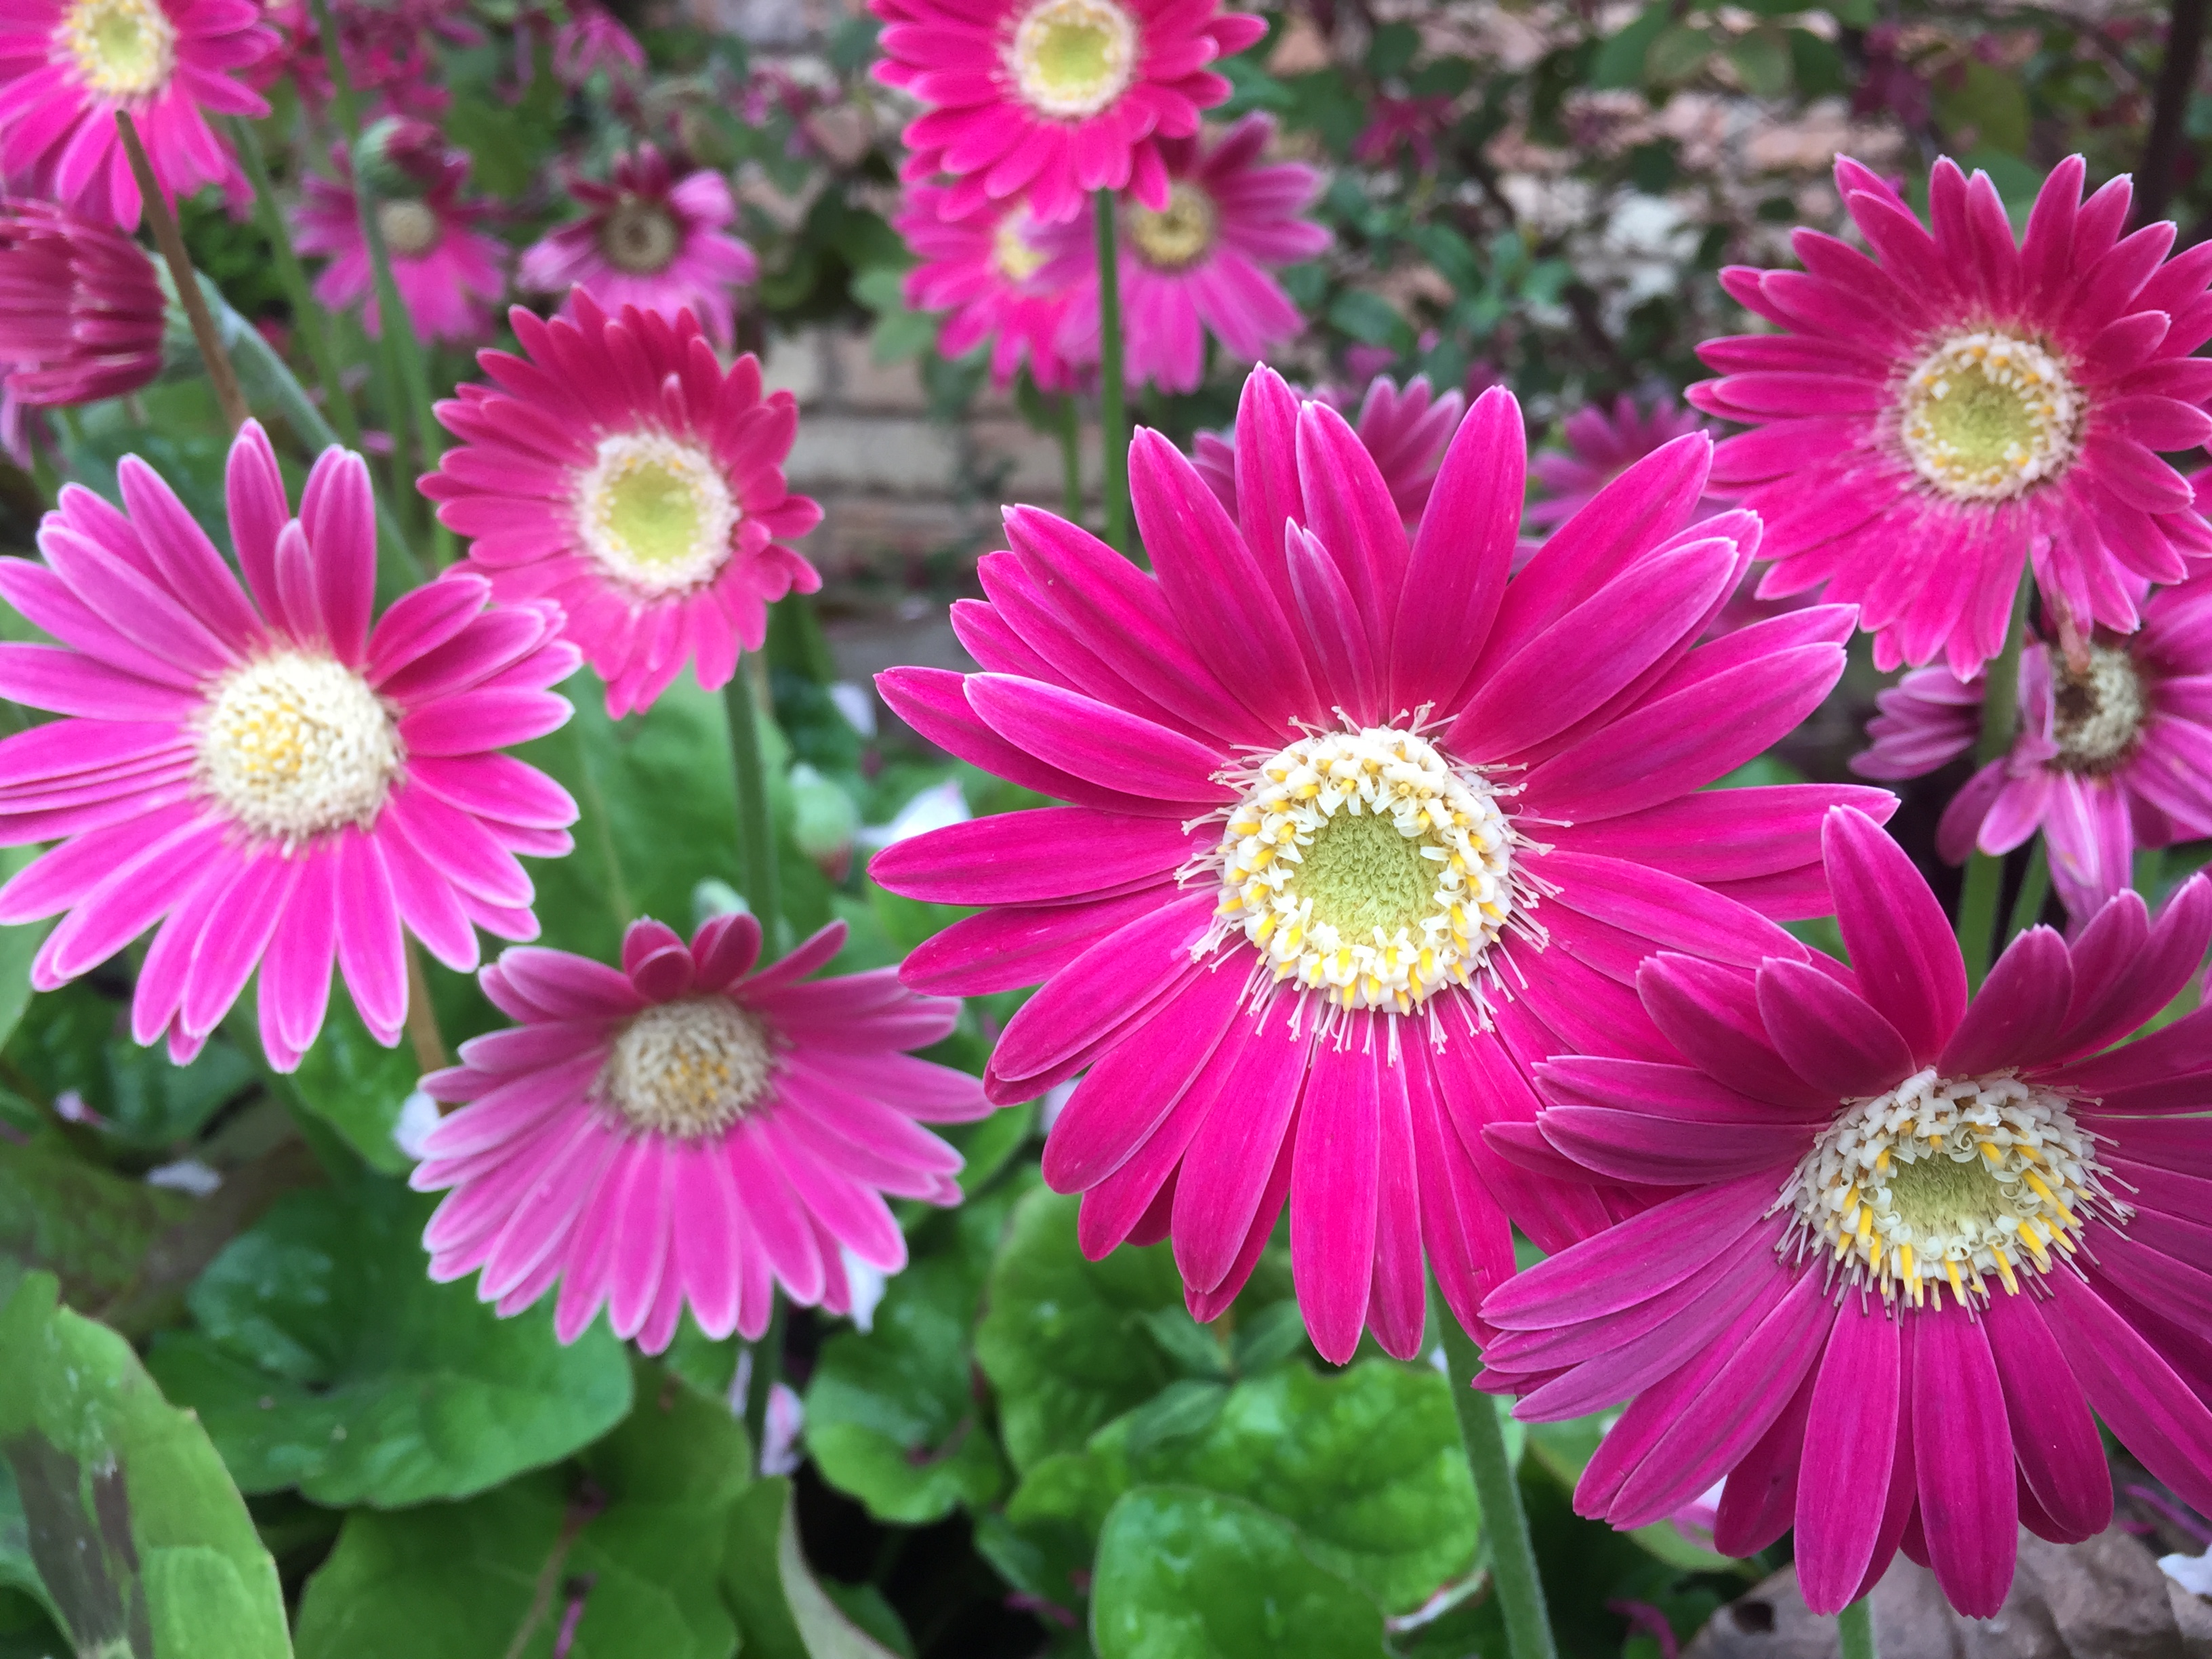
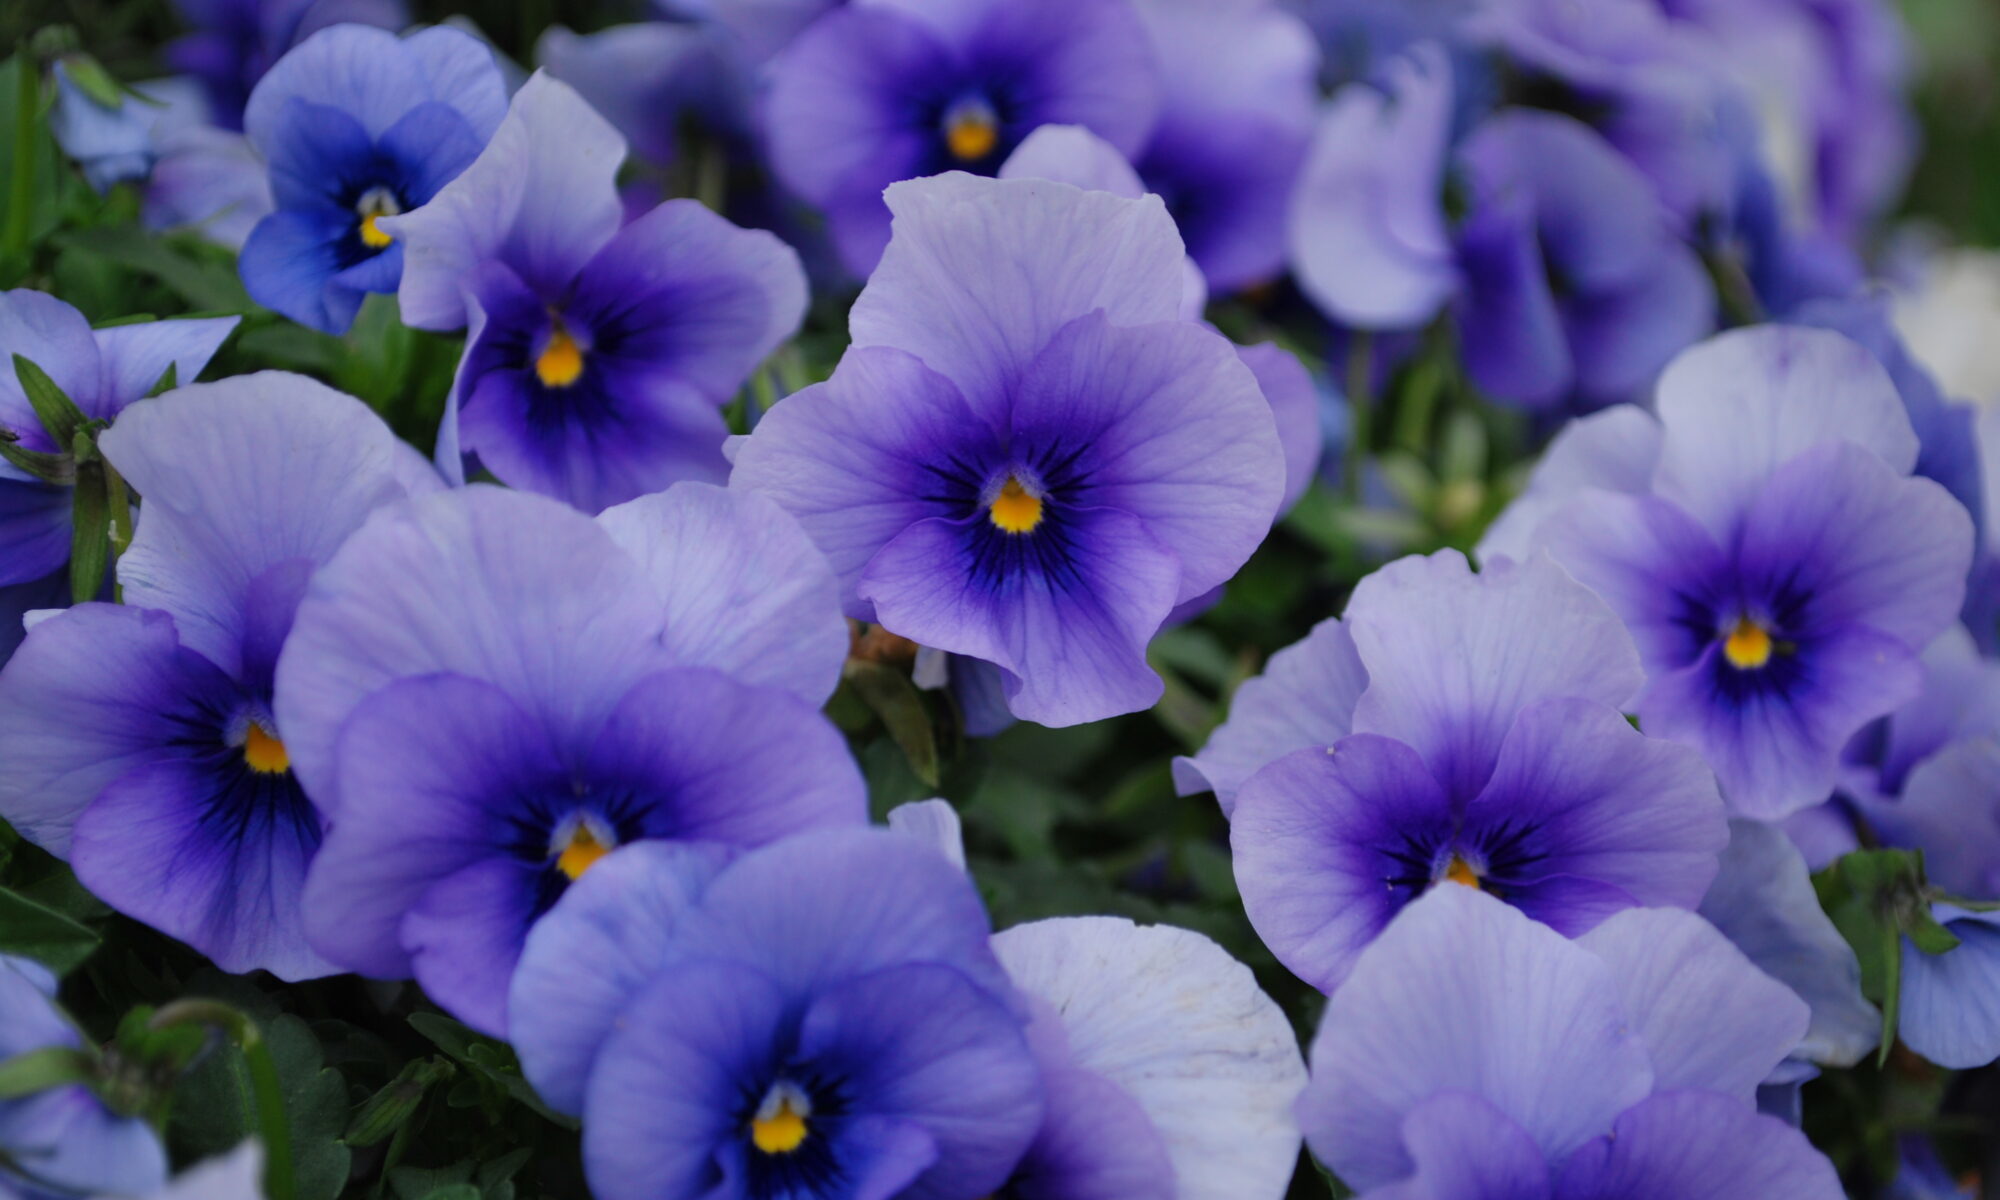
Plant photos – When certain plants or scenery are unavailable, pictures can be used to supplement the activity, particularly to show the context or location of a plant.

Leaf matching activity – Create a template tracing and copying uniquely shaped leaves like redbud, sweet gum, maple, oak, tulip poplar, ginkgo, and pine. Give each person a master sheet so that real pressed leaves can be fitted within the traced shapes. This works well with a range of cognitive abilities. Individuals with cognitive deficits are challenged to match shapes while others may be engaged to discuss the variety/shape/color of leaves.

eatbreathegarden_SMorgan

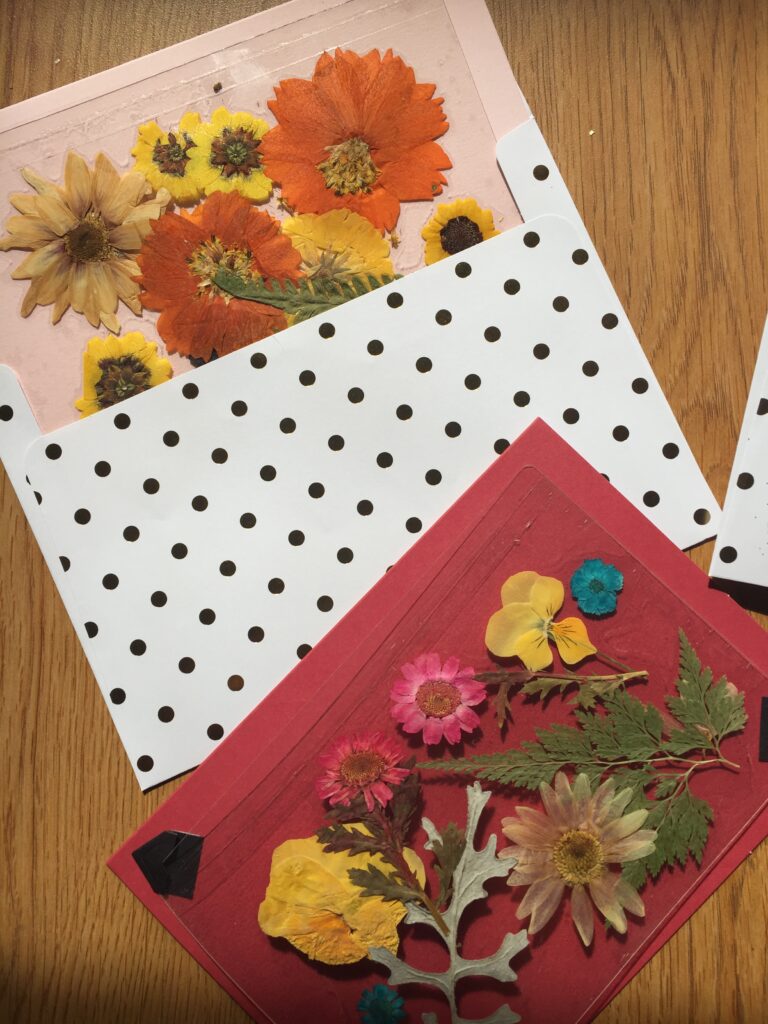
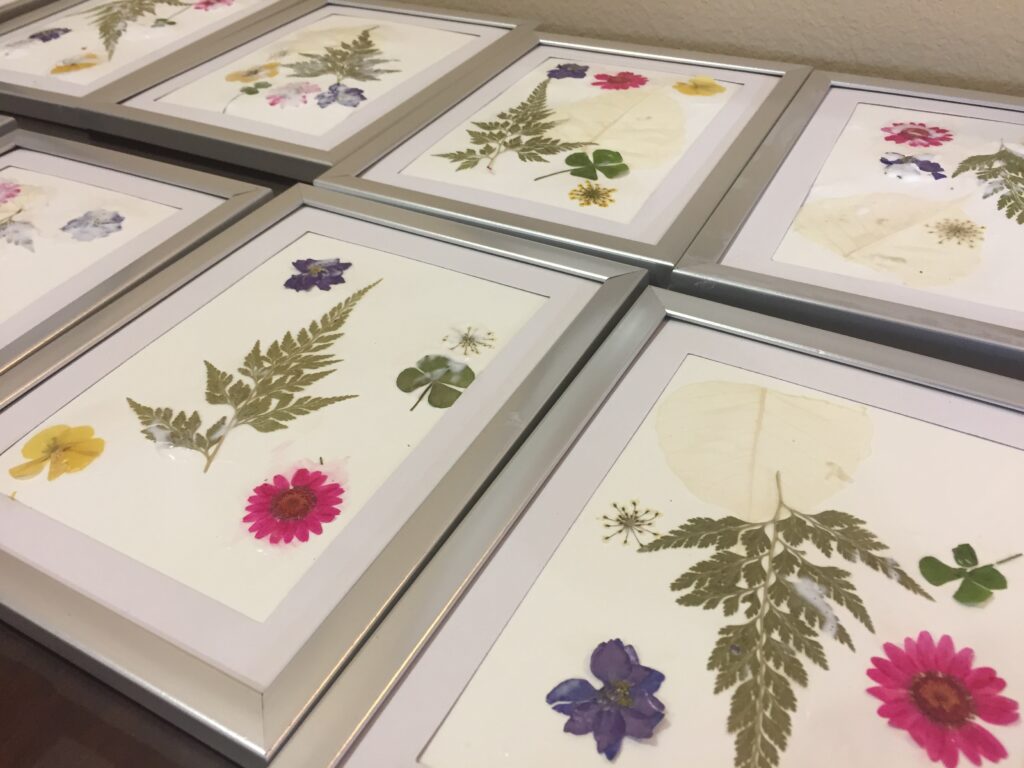
Pressed flower cards and suncatchers – Decoupage pressed flowers and leaves onto cardstock cards with deckled edge for Valentine’s Day, Mother’s Day, or other special occasions. Frame them with mats or inexpensive frames. Create bookmarks, mandalas, or “stained glass” patterns using self-sealing laminating sheets for art that glows backlit from sunlight when hung in windows.

eatbreathegarden_SMorgan

Inspirational quotes celebrating flowers that open and close each day – Flowers such as morning glories, four o’clocks, and night-blooming plants like evening primrose, cirrus and certain cactus provide an opportunity to discuss why some plants have these daily characteristics for pollination or energy conservation. Make pre-printed inspirational quotes about the moon available for pressed flower cards as an adjunct activity.

eatbreathegarden_SMorgan

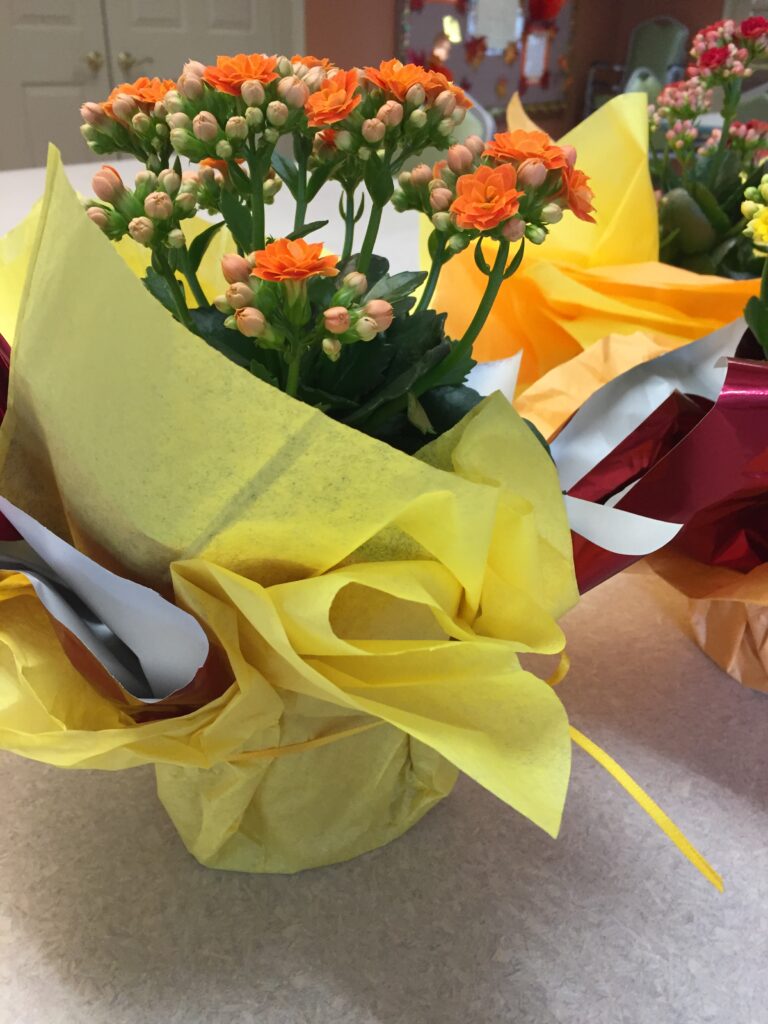
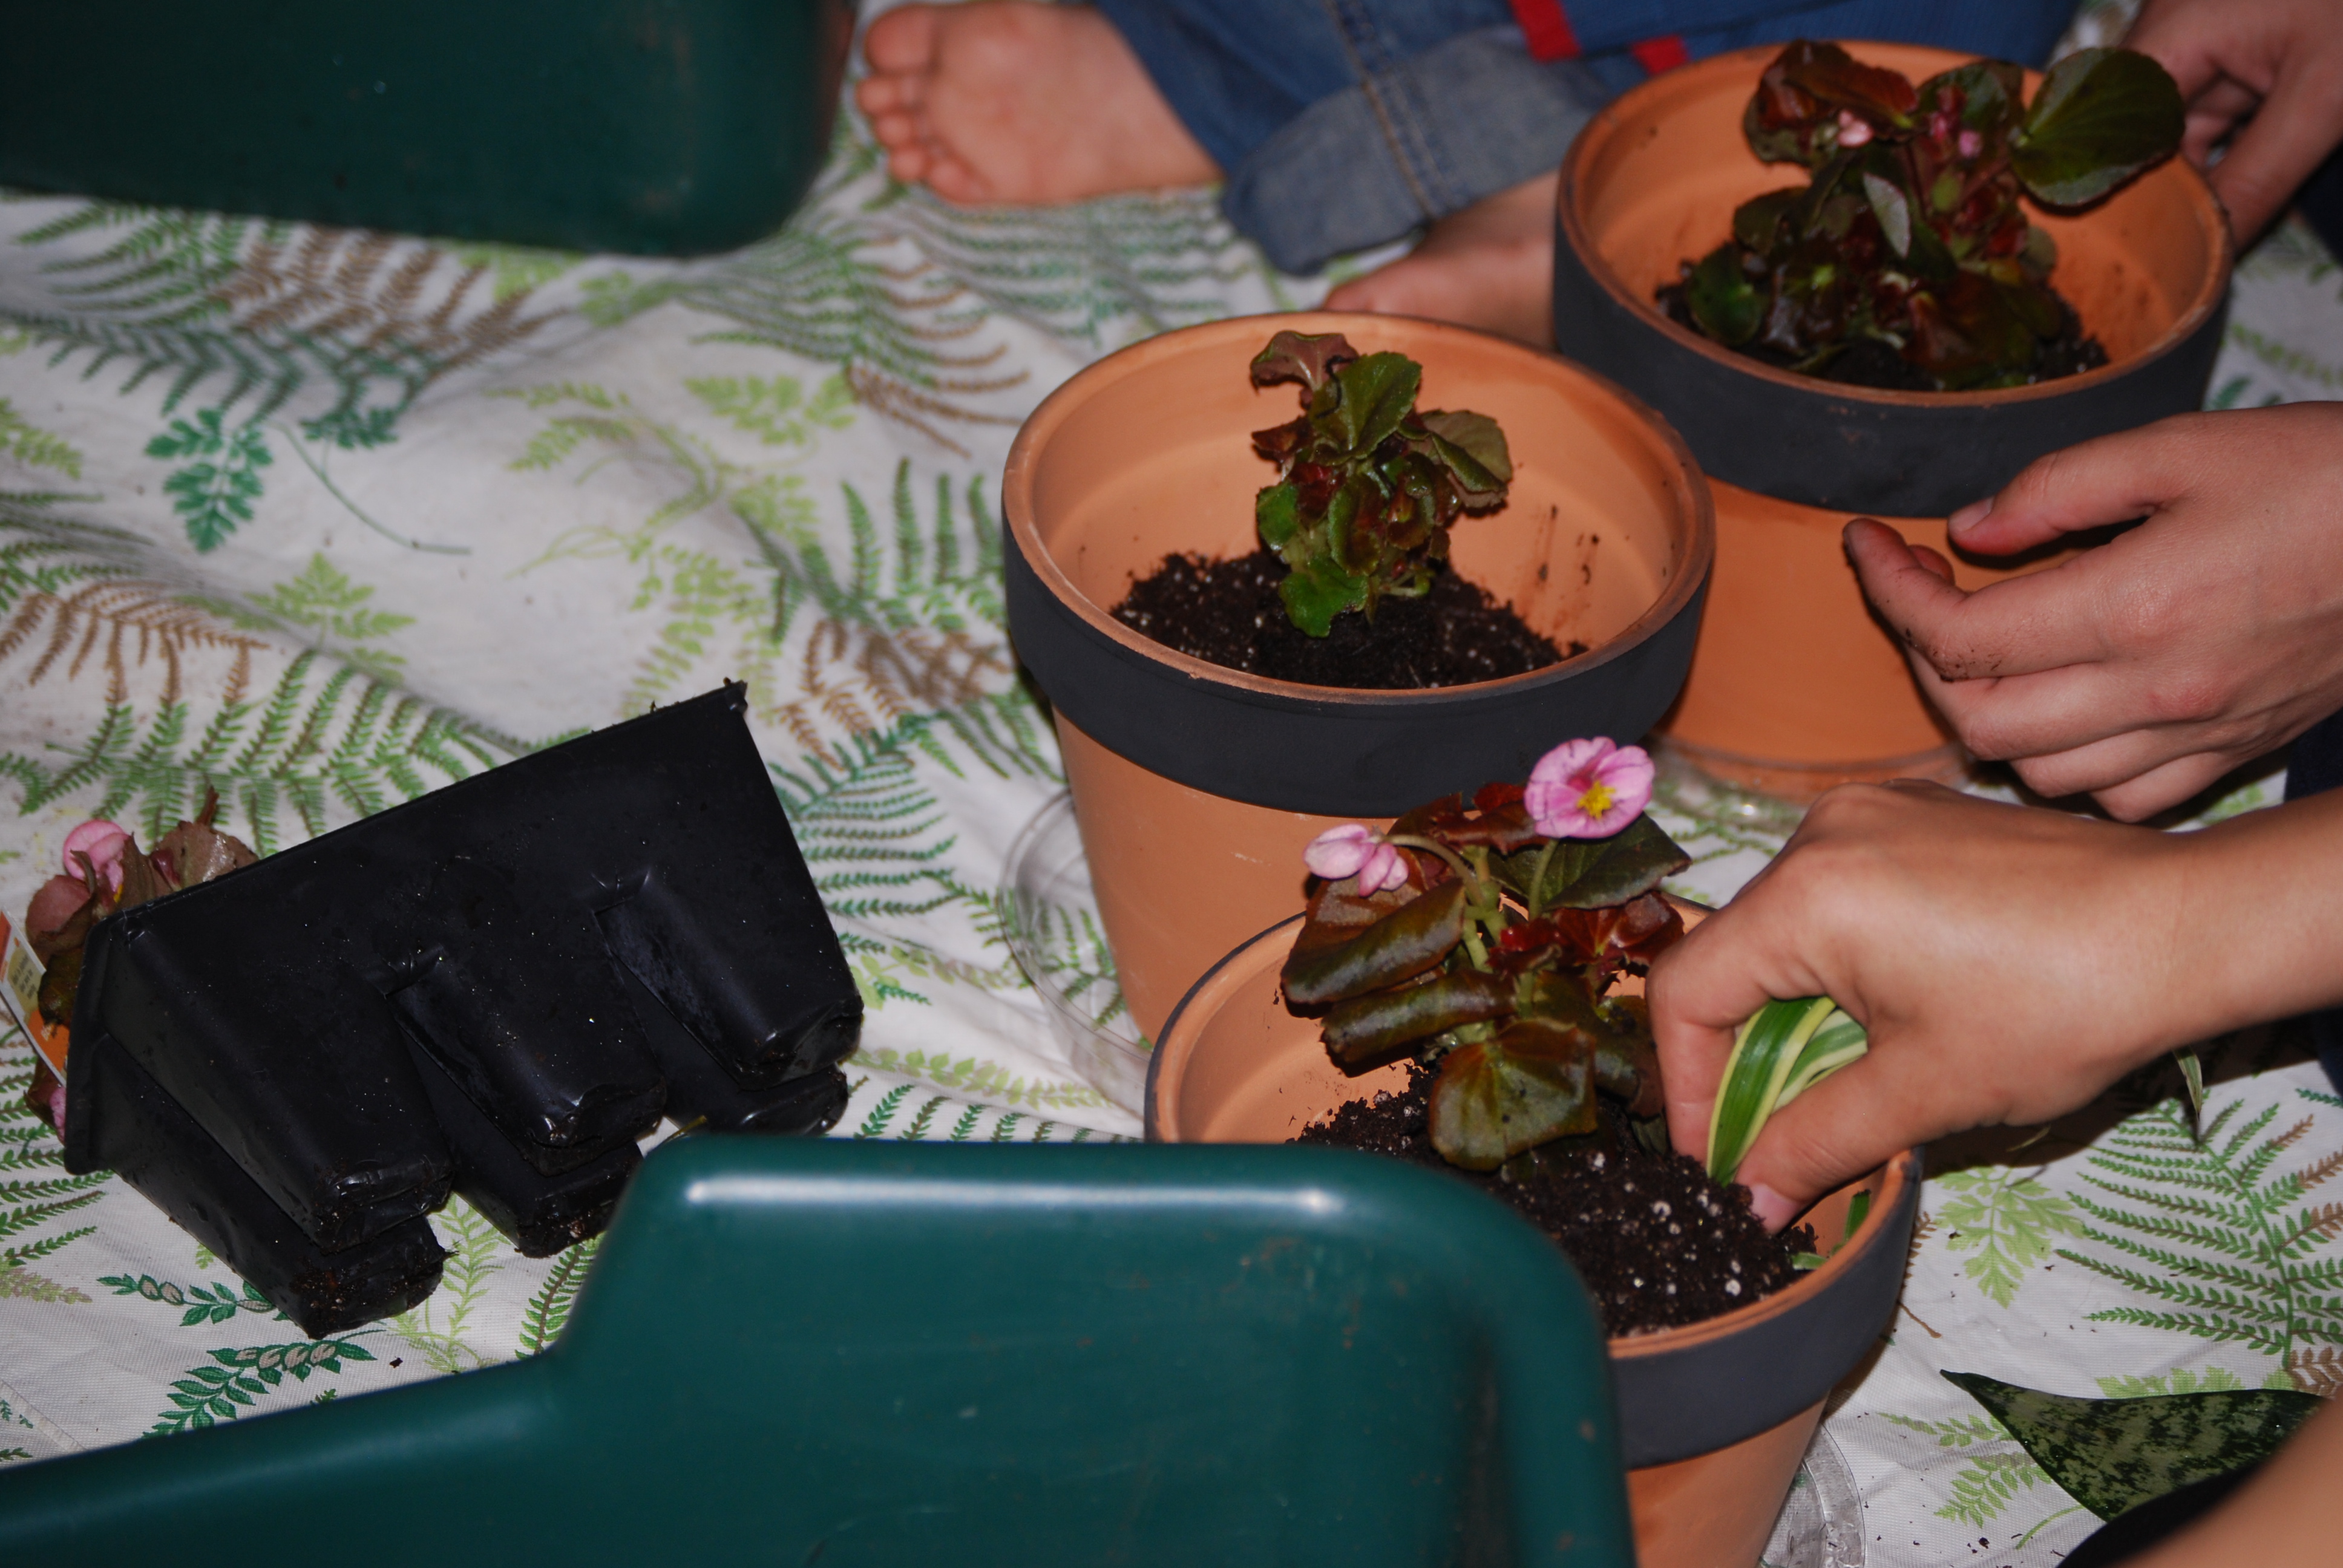
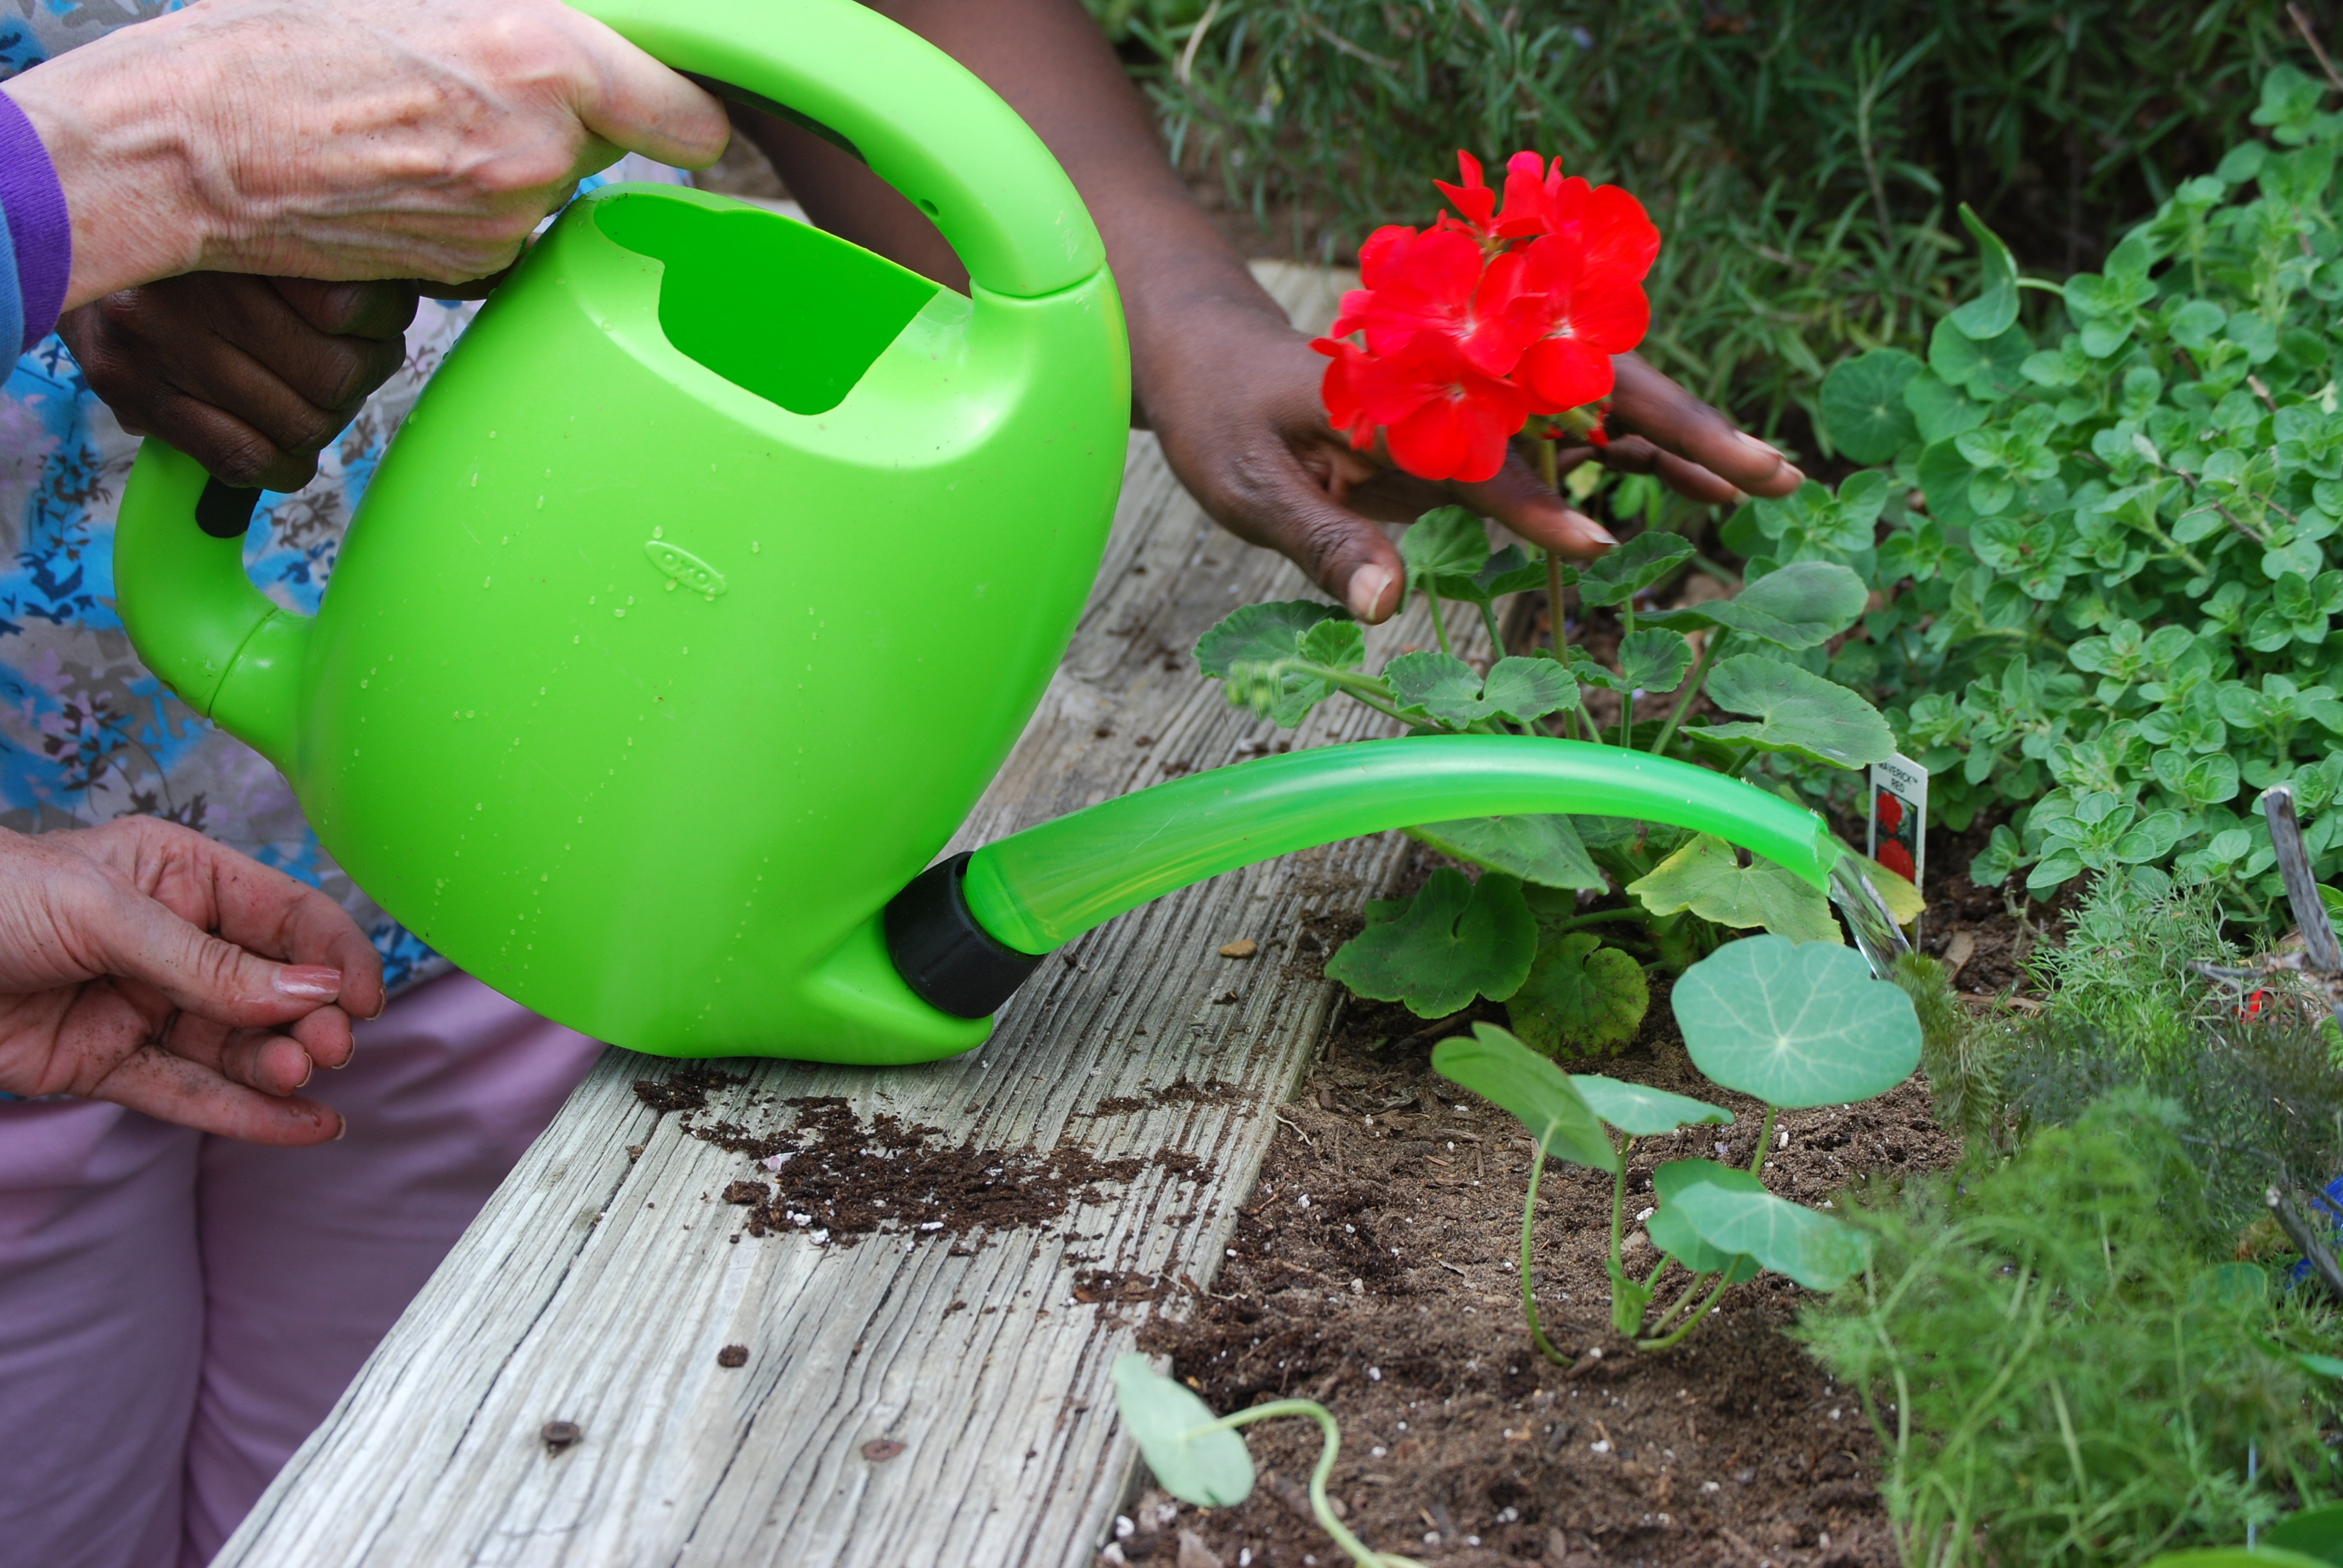
Gift it forward – Decorating small plants/flowers by wrapping them in tissue paper and tying with ribbon or jute can be an activity done individually or cooperatively with a buddy. Line tissue with waxed paper or cellophane wrap and cinch around plant. For facilities that prefer to have participants not take plants back to rooms, gather decorated plants into a large basket to display in a community gathering area for a few days, followed by gifting plants to loved ones for holidays, thank-you to staff members during Nursing Home Week. Purchasing a flat or six pack of flowers makes this activity cost effective.

eatbreathegarden_SMorgan

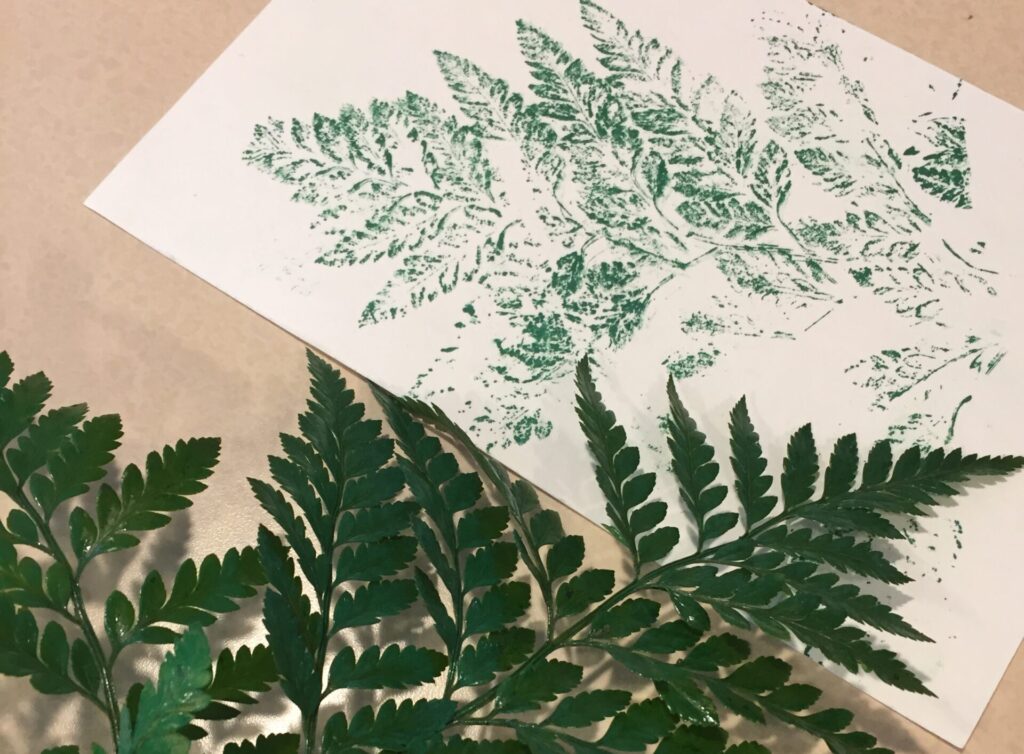
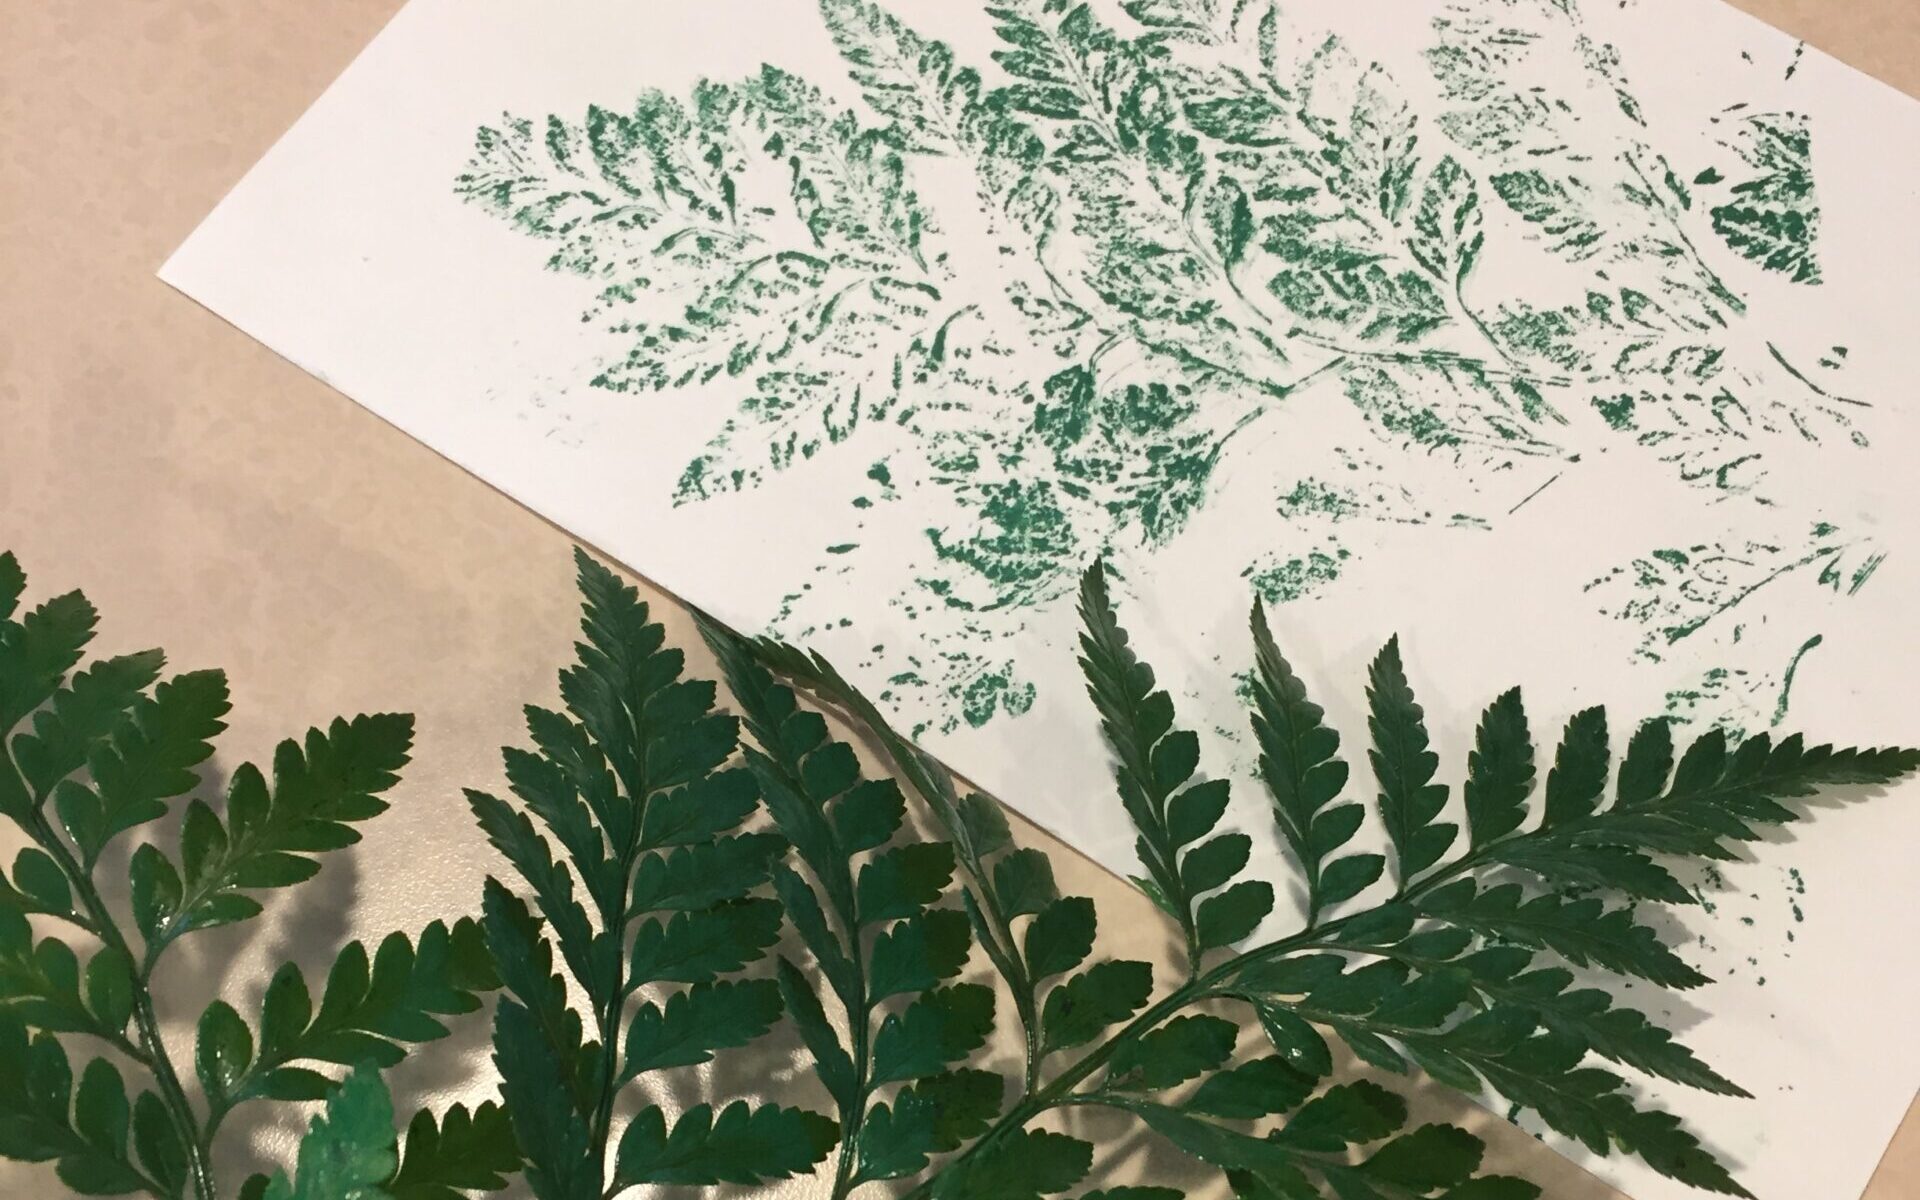
Flower and leaf printing – Cut flowers like daisy, buttons, or pom style mums can be dipped into paint, printing flower heads onto thick watercolor paper. Use leatherleaf stem from the grocery store florist to make leaf prints using stamping ink pads. To do, lay leatherleaf stem on paper towel or newspaper and press ink pad all over the top of the leaf, ensuring good coverage of ink on leaf. Turn leaf upside down onto watercolor paper, place paper towel or newspaper as blotting paper over top of leaf, and press firmly. Experiment with variations of this technique.

Paper quilt with flower prints – Follow flower printing session with a group activity to create a paper quilt using uniform sized paper, complementary or multiple shades of paint color, and construction paper border to unify flower prints together. Combine everyone’s artwork and display both the quilt and paint-dipped flowers. Themes of Fourth of July and Christmas flowers can augment activities.

Bingo with leaf markers – Add zest to this popular game by substituting paper or real leaves as markers. Consider nature/garden related bingo cards.

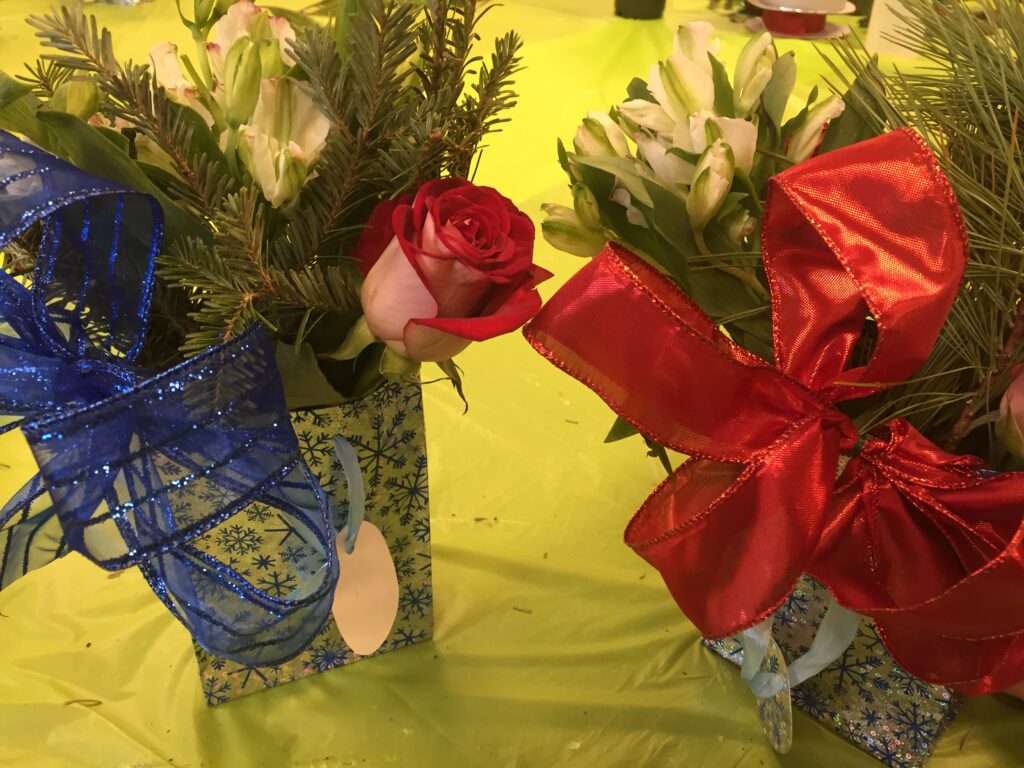
Paper bag vases for floral arranging activities – Use inexpensive paper gift bags as vases for a substitute to water filled vessels. This activity has several dimensions including applications for populations likely to spill water in vases or with restrictions using glass containers, flower arranging without water using cut greens, baby’s breath, statice, and button moms that last a few days without water. For groups where water does not pose a challenge, place a plastic cup within gift bag for floral arrangements. Inexpensive ornaments can be added for extra flair.

Making houseplants and flowers out of paper – The internet, Pinterest, and numerous books offer instructions on making flowers and houseplants from paper (Handmade Houseplants: Remarkably Realistic Plants You Can Make with Paper by C. Hogg, Paper to Petal: 75 Whimsical Paper Flowers to Craft by Hand by R. Thuss). Position live inspirational plants and flowers in the table center to encourage participant creativity.

Plant Adaptations: Metaphors for Overcoming Life’s Obstacles

Originally posted on the Horticultural Therapy Institute blog

Plants have acclimated to grow in all sorts of climates and growing conditions, whether they are cloud forests and rainforests or aquatic, alpine, or desert habitats. Native plants in these ecosystems have adapted to the soils, temperatures, precipitation, wind, and other unique conditions of their habitats. This is evidenced by their growth habits, methods of pollination and seed dispersal, and other plant characteristics.

Through in-depth examination and discussion of plant adaptations to their habitats, horticultural therapy clients can translate stories of plants’ resilience to personal experiences in challenging situations. Plant adaptations don’t happen overnight, and this perspective may help cultivate insight on current personal challenges. One might ask, “If a plant can grow, flower, and survive in a tough environment, I might be able to adjust and thrive despite the challenges of my own situation.”

One example of adaptation involves plants that grow in the hot, arid conditions of the desert. We may think of the desert environment as extreme and brutal, but the plants that live there have adapted to flourish in these conditions. Check out some of the ways in which desert-inhabiting plants have learned to survive despite the odds.

KalanchoePanda_SusanMorgan

Many plants have thick succulent leaves, stems, and roots (which are often extensive root systems). These allow plants to soak up as much water as possible during infrequent periods of rainfall and store it for the dry spells. The plants then often conserve resources and expend less energy, resulting in slow growth habits. The slower they grow, the less food and energy is used.

Cactus_SusanMorgan

Some desert plants have minimal to no leaves or shed leaves during times of drought so as not to use all the plant’s energy in sustaining a sizable leaf canopy. Despite having no leaves, cactus stems are able to conduct the process of photosynthesis. Ever notice how some cacti, like barrel cactus, have a “ribbing” on their stems? This acts like an elastic waistband, allowing the stem to swell as it absorbs water when it rains and shrink as it conservatively uses its resources during dry spells.

OldManCactus_SMorgan

The “hair” on plants helps to shade the leaf surface and reduce water loss. Plus these hairs and thorns of plants make them much less palatable for animals to munch.

Kalanchoe_SusanMorgan

The waxy coating of leaves and stems also help to reduce water loss.

IMG_4450

The leaf arrangement and growth habits of some plants help to efficiently manage exposure to the sun and elements.

FloweringSucculent_SusanMorgan

Several flowering plants conserve energy by opening their blooms for a brief period at certain times of the day. Blooms open up at the time of day when their pollinators are most active and then are closed the rest of the day.

Examining plant adaptations with clients in therapeutic horticulture activities

To engage clients, research and make a list of your area’s growing conditions and native plants. Or, select a different ecosystem to study. This can be done either with clients or during pre-session preparation. Have living specimens, pressed plant material, and/or photos of native plants in their habitats available for client interaction. Discuss what qualities make them suitable for growing in this environment. Note how plants don’t all adapt in the same way – for example, some plants have thorns that are a visual and physical deterrent that keep them from being eaten by animals, while others contain poisonous compounds that make them undesirable. Encourage client discussion to similarly evaluate the characteristics of their own environments (the people, situations, culture, etc. in these surroundings) and identify personal adaptations and healthy coping strategies that can enable them to grow and thrive in these surroundings.

SucculentTrough_SusanMorganFor succulent plant activities, plant individual or group dish gardens or open terrariums with succulent plants that offer diverse characteristics. Encourage clients to select a favorite plant and explain what is interesting about it. Explore the senses by blending a special soil mix with sand and/or gravel, ideally suited for succulents. Add a creative flair with colored sand and aquarium gravel as a mulch. Repurpose objects, like colanders, old shoes, and strawberry jars, as planters for succulents. Use woodworking skills to craft wood scraps into planting troughs and then use a woodburning tool to etch inspirational phrases on the side (as shown in photo). (Note: use caution when working with thorny or caustic succulents and gravel and when using woodworking and woodburning tools.)

Sources:

Missouri Botanical Garden, “Biology of Plants: Plant Adaptations.”

Arizona-Sonora Desert Museum, “How Plants Cope with the Desert Climate.”

National Park Service, “Plant Adaptations.”

Originally posted on the Horticultural Therapy Institute blog

Save

Save

Save

Save

The Transformative Experience of Basil Seed

BasilSeedTransformation_eatbreathegarden

At a time when gardeners are sowing seeds in preparation for the spring garden, let’s talk about seeds…basil seed in particular.

About a year ago, friend and fellow practitioner Charles Plummer of Youth with Faces told me about how basil seed can change before your very eyes, if you just add water. He had learned this from Rebecca Haller, HTM, during one of the Horticultural Therapy Institute’s courses.

Somewhat skeptical, I said, “Well, what happens?”

He encouraged, “Just give it a try and see what happens.”

It took me a couple more months – when I was preparing to lead a seed sowing session with one of my groups – before I was in the same room as basil seed, an eye dropper, and some water. So in taking Charles’ advice, I gave it a try.

And WOW!

Did you know that basil seed can change right before your eyes in just a few seconds?

In a world of instant gratification, clients can sometimes get impatient with the “slow growing” nature of plants in the garden. This is a great opportunity for a meaningful lesson, or actually a series of lessons, on the phrase “Good things come to those who wait.” The act of nurturing a plant – from seed to seedling to full grown plants that can be harvested for eating or collecting seed – can help the gardener experience the cyclical nature of life in real time. Some things just don’t happen overnight…patience is a virtue.

However, at other times, an activity with instantly gratifying results can be equally as powerful and transformative. Here, watching a basil seed from start to finish can help shift a person’s self-focused attention outside of themselves to something that is so tiny. In a sense, it can be incredibly grounding for one’s perspective to watch a seed that’s a centimeter in size transform itself. (Read more on the transformative nature of awe and the healing power of awe, supported by recently published research in the journal Emotion.)

So what exactly does the basil seed do when you add water? As Charles would say, just give it a try yourself. I’ll give you a sneak peek below.

BasilSeedTransformation_eatbreathegardenTo start, gather together the following materials: basil seed (I used the Genovese type because it was handy, though I’m sure pretty much any basil seed would work), cup of water, eye dropper, and your hands.

BasilSeedTransformation_eatbreathegardenOpen your hand out flat so that the palm of your hand is facing up toward the sky. Gently tap some basil seed out of the seed packet into the palm of your hand. Take note of what the basil looks and feels like at this time. The seed is tiny in size and black in color – it kinda looks like the poppy seeds that get stuck in your teeth after eating a poppy seed bagel. Use a finger from your other hand to roll the dry seed around in your hand. Focus your attention on the sensation of the seed rolling around in your hand.

BasilSeedTransformation_eatbreathegardenNext, get some water in your eye dropper and add a few drops of water over the top of the seed. Make sure the seed has contact with the water.

BasilSeedTransformation_eatbreathegardenNotice how the added water feels to your skin – cool and wet. And watch.

BasilSeedTransformation_eatbreathegardenFocus all of your attention on the seed. Be patient and watch. It doesn’t happen instantly. And, don’t worry, the seeds aren’t jumping beans, so they won’t start popping up into your face. They also don’t grow spikes or turn into orange and blue polka dots.

Just watch…

And watch…

And watch until…

There! Do you see it?!?

What happened? The basil started turning a different color. What color? It’s kind of a gray color, right?

Keep watching…

BasilSeedTransformation_eatbreathegardenAfter a few seconds – at least 30 seconds, probably more – the basil seed will soak up most, if not all, of the water. The seed will have changed from tiny, black seeds to slightly larger, puffier, whitish gray seeds. If you look very closely, you can actually see the layer of seed mucilage over the seed coat.

So what is seed mucilage? It is a thin gelatinous layer that forms over seeds when exposed to moisture. Basil seeds form noticeable amounts of mucilage. You can even do this same experiment with chia seeds and notice the copious amounts of gel that form. Weird. (Read more about mucilage and its purpose here.)

After I first did this activity, I felt exhilarated and inspired to learn more about why these seeds do this – and every time I have done this activity since then, I’ve felt the same way. There is always a point – typically right when the water is added to the seeds – at which I think to myself, “Will the seeds change?” And then it happens.

Aren’t plants amazing?

Unique Trees That Have Faced Adversity

Wollemi Pine eatbreathegarden

Just like people, plants can tell some interesting stories. Check out the tales of these trees.

Wollemi pine (Wollemia nobilis). A prehistoric tree that grew 90 million years ago, the Wollemi pine was thought to be extinct until a stand of the trees was found about 20 years ago growing in a national park just north of Sydney, Australia. The photo above is of a Wollemi pine taken at the Royal Botanic Gardens, Kew, in London, England, about ten years ago. Read more about the Wollemi pine here.

Japanese white pine (Pinus parviflora). A nearly 400-year-old Japanese bonsai survived the Hiroshima blast and is now located at United States National Arboretum in Washington, D.C. Read more about this bonsai here and here.

Lodgepole pine (Pinus contorta). The 1988 fires burned over one million acres in Yellowstone National Park. Though it burned through acres of vegetation, the fire actually heated up the resin within the pine cones of the lodgepole pine, releasing the seeds which otherwise would have been held captive inside the cones for many years. Many seedlings germinated by the following year. Read more about the lodgepole pine here.

General Sherman giant redwood (Sequoiadendron giganteum). The world’s largest tree by volume is located in the Sequoia National Park in California. Check out the stats on the General Sherman tree here.

[Note: This article was originally published as part of a larger article “Warrior Plants” in the AHTA News Magazine for the American Horticultural Therapy Association.]

Propagating Plants and Celebrating our Unique Qualities

Plantingbegonia3sticksTherapeuticHorticulture

In my last post about working with a group of Afghan women, following a discussion about the qualities that make us uniquely us, I invited the group to propagate three plants – Sansevieria, spider plant, and begonia – in a small pot.

Apr2015 1602Then I gave them three brightly colored craft sticks, all different colors, and asked them to think of three words that describe themselves and describe the uniqueness of “me.” I encouraged them to write the words in their primary language on one side of the stick, and then we would translate them to English and write the words on the other side of the sticks. We worked together to do this portion of the project, and each participant proudly shared the three words that make them uniquely them. They inserted their sticks into the pot, assigning each plant the unique quality written on the stick.

Apr2015 1608

What are three words that describe the uniqueness of YOU?

Mini Blooming Pumpkins

Blooming Pumpkins

Miniature orbs decorated with dried flowers…how fantastically “fall!” If you’re looking for some no-carve, no-Halloween, pro-Thanksgiving pumpkin decorating options, look no further than these season extending mini blooming pumpkins.

Blooming PumpkinsSupplies                                                                                                    
Mini pumpkins
Glue (Elmer’s glue works fine, but heavy duty craft glue works better)
Dried flowers
Scissors
Sharpie pen
Decorative tags, optional
Twine or wire, optional

Blooming Pumpkin

Step-by-Step Instructions                                                                
Select the pumpkin and the flowers to be used in decorating it.

Prep the flowers by removing stems and unsightly petals or leaves.

With the pumpkin sitting upright in front of you (stem pointing up), apply a generous amount of glue around the base of the stem. Don’t be stingy here – make sure to apply the glue all over the top of the pumpkin, right up to and away from the stem.

Quick note – whenever I work with glue, it’s important to constantly remind myself and clients that THE GLUE WILL DRY CLEAR. So don’t sweat it if you accidentally apply too much and it starts to run down the sides of the pumpkin, or get it on the “good” part of the flowers. THE GLUE WILL DRY CLEAR!

Blooming PumpkinWith the glue in place, begin placing flowers on the top of the pumpkin. There’s no rhyme or reason on how to apply flowers – just make it look pretty to your tastes.

Apply additional glue as necessary to ensure all flowers have glue on them. (This is where I like to use Elmer’s glue since the tip of the bottle easily inserts between flowers to provide targeted glue application. If using craft glue, use a cotton swab to apply targeted globs of glue as needed.)

Blooming PumpkinsKeep applying flowers, rotating the pumpkin 360 degrees during application to ensure even coverage of flowers on all sides.

Continue until complete.Blooming Pumpkin

If attaching a decorative tag, write a quick note or greeting, inspirational quote, your name, or whatever on the tag.

Thread the wire through the hole in the tag.

Attach the wire to the pumpkin’s stem and secure in place. Voila!Blooming Pumpkins

Notes for Horticultural Therapy Practitioners…                        
Aside from the changing colors of fall leaves, pumpkins provide a great seasonal cue to place clients in the time of year. To me, pumpkins represent autumn…and not just Halloween. I like blooming pumpkins as a season extending activity that’s appropriate to display all the way up to Thanksgiving. And, since I’m not able to easily use sharp knives or do pumpkin carving for safety and logistical reasons with most of my groups, this activity is an ideal option.

This is also an activity that can require more than one session for preparation, if you’re lucky enough to have an outdoor garden to utilize with a therapeutic horticulture program. One session can include the planting of annual flowers and perennials that are suitable for drying. Subsequent sessions include the maintenance and gradual harvesting of these flowers in the garden.

And did you know that pumpkins float in water?!? Oh, don’t get me started on that…

Blooming PumpkinsContraindications                                                                                   
If you need to cut the dried flowers into smaller pieces, and you’re working with a group where sharp objects like scissors or pruners are potentially unsafe, here are a few tips to follow:

– Use child-safe scissors, not sharp scissors or pruners.

– Use flowers that are easy to pinch with the fingers. Be mindful of the level of the “ease of pinching,” in comparison to tolerance levels, for those who have fine motor issues.

– Pre-cut the stems off flowers and have them ready for use ahead of time.

Other potential issues:

When glue and flowers may be eaten by some individuals with cognitive challenges, use non-toxic options. Avoid putting flowers in bowls or other food-related objects.

Program Notes                                                                                         
Whenever I do this activity, I like to incorporate opportunities for clients to reminisce about their favorite holiday memories. So prior to doing the activity creations, we answer open ended questions about Thanksgivings past. For large groups, we break up into small groups and pass out pieces of paper with prompt questions. The groups identify a group leader and discuss their answers to the questions. After a few minutes, we gather back together and discuss the responses as a group.

Examples of prompt questions
– What is your favorite part of Thanksgiving?
– What are you are thankful for?
– What is your favorite food to eat on Thanksgiving?

Prompt questions inspired by JournalBuddies.com

Budget Buster Tips                                                                              
– Grow your own flowers for drying. Harvest them throughout the season. Prep them and hang to dry until ready for use.
– Recycle flowers from old floral arrangements before discarding them. Baby’s breath, statice, and yarrow are examples. Whenever I do floral arranging programs throughout the year, I always use flowers that can be dried, and then harvest them from the old arrangements or leftovers after a program.
– Can’t afford pumpkins for each person? Get a handful of pie or Jack pumpkins, and have your group work in small teams to strategize and decorate a “community” pumpkin.