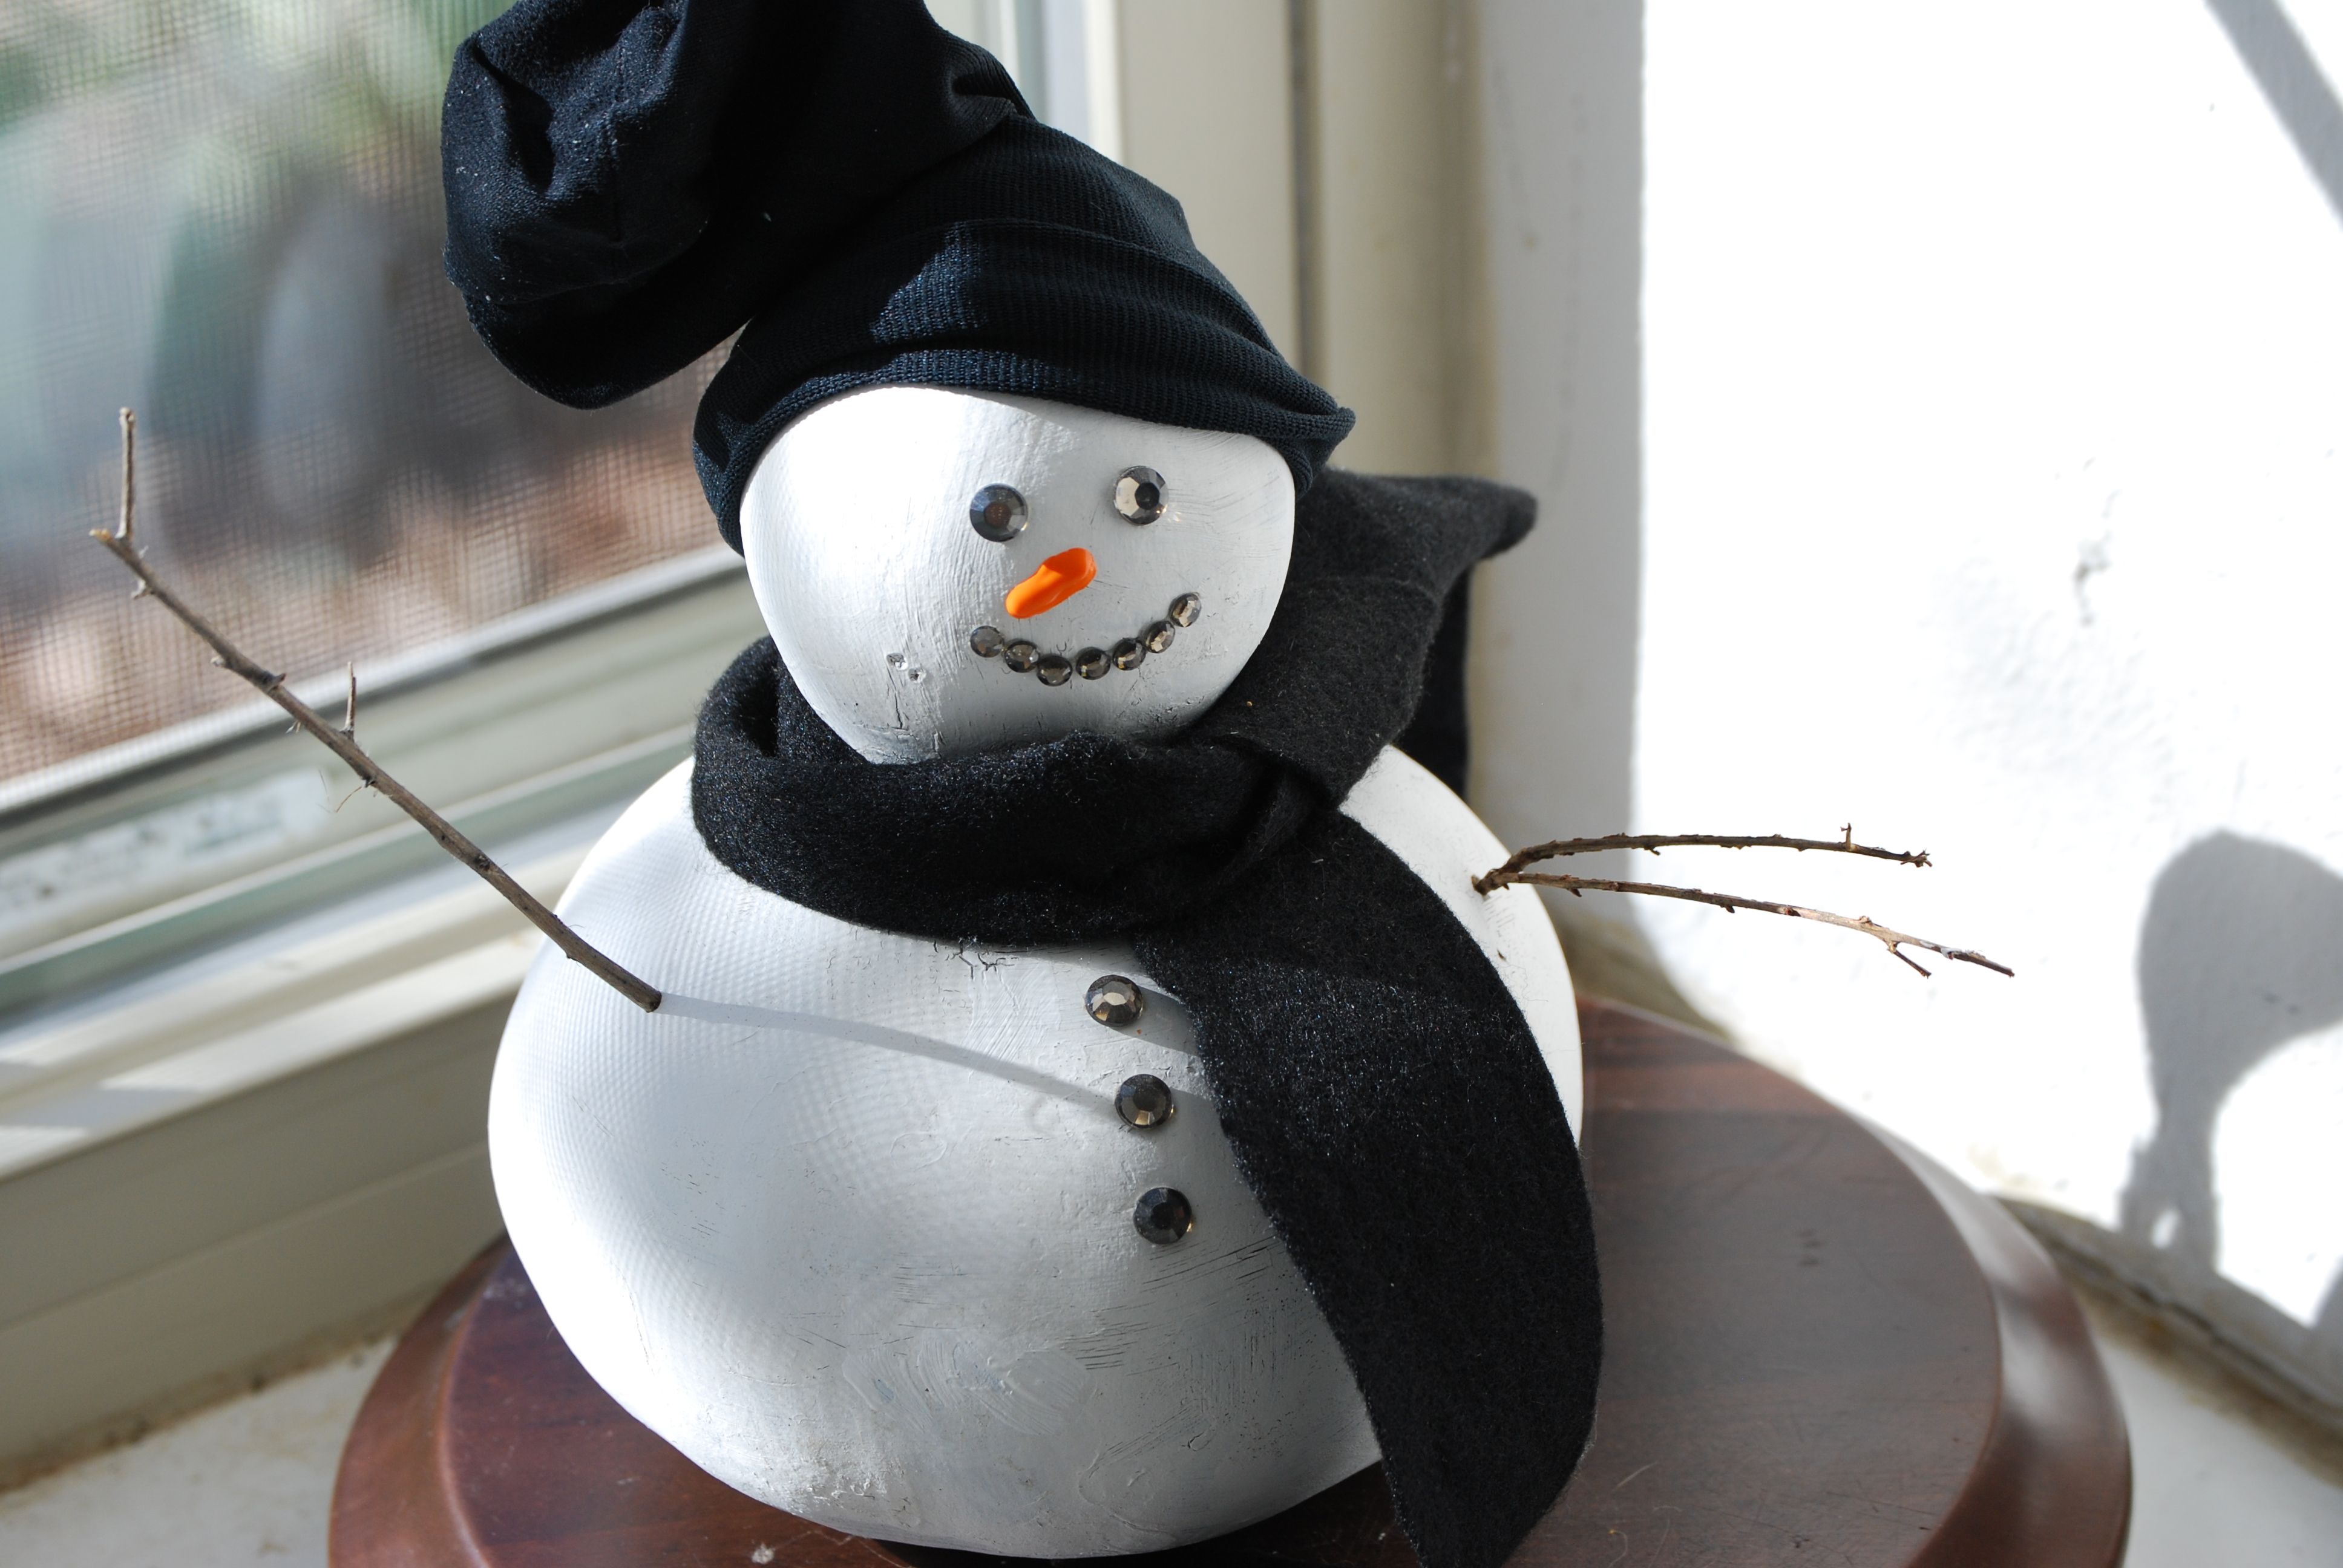
It’s a snowman…made out of gourd!?! Typically a favorite fall accessory, gourds can be used year-round for craft projects due to their hard woody shells that aren’t inclined to rot. So in January, when you’re looking for new indoor activity ideas, embrace the winter season and transform these lesser known cousins of pumpkins and squash into a cool season Mr. Potato Head of sorts.
*Note: More photos to come…hopefully! My external hard drive (where ALL of my photos are stored – *palm to forehead*) crashed while working on this post. Cross your fingers and toes that I am able to get all my photos back. I staged a couple of shots so I could get this post online.

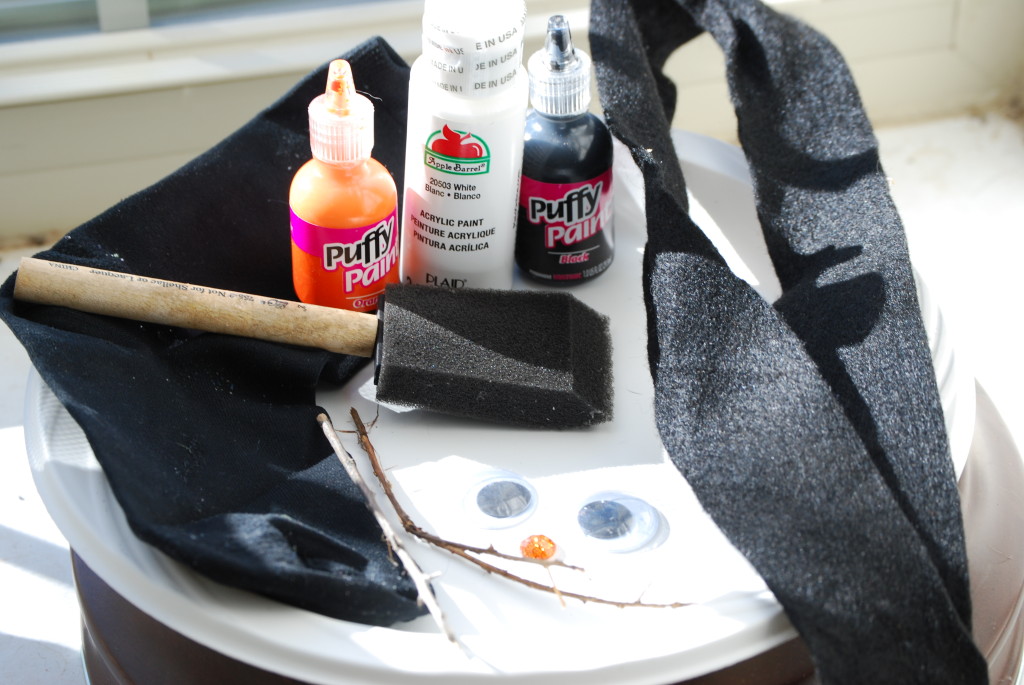
Supplies
- Gourd, cleaned, prepared, and ready for crafting
- Newspaper
- Paint (in white; use other colors for additional decorating, only if you have time to allow the white to dry first. Acrylic paint works best; tempera is ok but prone to flaking, especially if it’s washable tempera.)
- Paintbrush
- Plate for paint
- Hair dryer, optional
- Socks, preferably women’s dress socks (I prefer socks over other materials because they’re stretchy to fit any sized gourd “head” and cheap and easy.)
- Googly eyes (is there another name for these?), optional
- Glue (if using googly eyes)
- Rhinestone stickers (I have used black and orange stickers for the eyes/mouth/buttons and nose respectively), optional
- 3-D paint (otherwise known as “Puffy Paint,” in black and orange)
- Pencil
- Drill with drill bit
- Twigs (with a diameter that matches the drill bit)
- Pruners
- Ribbon or fabric (I used narrow pieces of black felt, with “fringe” cut at both ends)
- Scissors
Step-by-Step Instructions
Gather together supplies and have ready. Make sure the hair dryer is plugged in, and the drill is fully charged. Pour the white paint onto a plate, and add a paintbrush.
Set the gourd on a piece of flat laying newspaper.
Paint the gourd completely white – top to bottom. (One coat of paint is fine; two coats are perfect.)
Allow the paint to dry. To expedite the drying process, you can use a hair dryer to dry the paint. Keep the dryer moving at all times to avoid heating up any one section too much. For me, the heat from the hair dryer did cause a tiny amount of cracking in the paint, but nothing too bad – I was satisfied with the results and touched up any cracked or faded spots with additional paint. Allow the paint to air dry, if you intend on creating high quality products or have the time to dry and come back to finish (which I don’t during a one-hour program).
Pull the black sock over the upper portion of the gourd onto the snowman’s “head.” Fold the ends of the sock up to make it fit the head like a floppy snow hat. Embellish the hat if desired.
Now it’s time to make the snowman’s face. Here are a few options for making the eyes. (1) Use glue to stick the googly eyes onto its “head.” (2) Or, apply rhinestone stickers for the eyes. They are three dimensional and look like charcoal to me. (Om, channeling Frosty…) (3) Or, use 3-D paint to create two dots for the eyes. (I prefer black for the traditional charcoal look.) Keep in mind that the 3-D paint could run a bit, if the sides of the gourd are steep. Laying the gourd on its side, with newspaper as shims to hold it upright, helps to prevent the paint from running.
Add the nose. Use the 3-D paint (orange, if you’ve got it) to draw a long and narrow sideways triangle – it should resemble a carrot.
Add the mouth. Use either the rhinestone stickers or the same color of 3-D paint you used to create the eyes, and add a few dots in a line to resemble a mouth.
Use the rhinestone stickers or 3-D paint to create “buttons” down the lower portion of the gourd, or the “body.”
Select the two spots where the snowman’s arms will go – one spot on each side of the snowman’s “body.” Use a pencil to mark the spots.
Use the drill to poke two holes into the gourd.
Cut the twigs to fit the holes and insert them. The twigs should fit tightly without wiggling loose. The twig arms need to stay right where they are. If you accidentally cut the holes too big, apply masking tape around the end of the twig and insert into the holes.
Cut the ribbon or fabric piece so that it will tie around the “neck” of the gourd, with a bit extra on the ends. Tie around the gourd, and voila! It’s a scarf.
Set your snowman in a safe location to dry completely.
 Notes for Horticultural Therapy Practitioners…
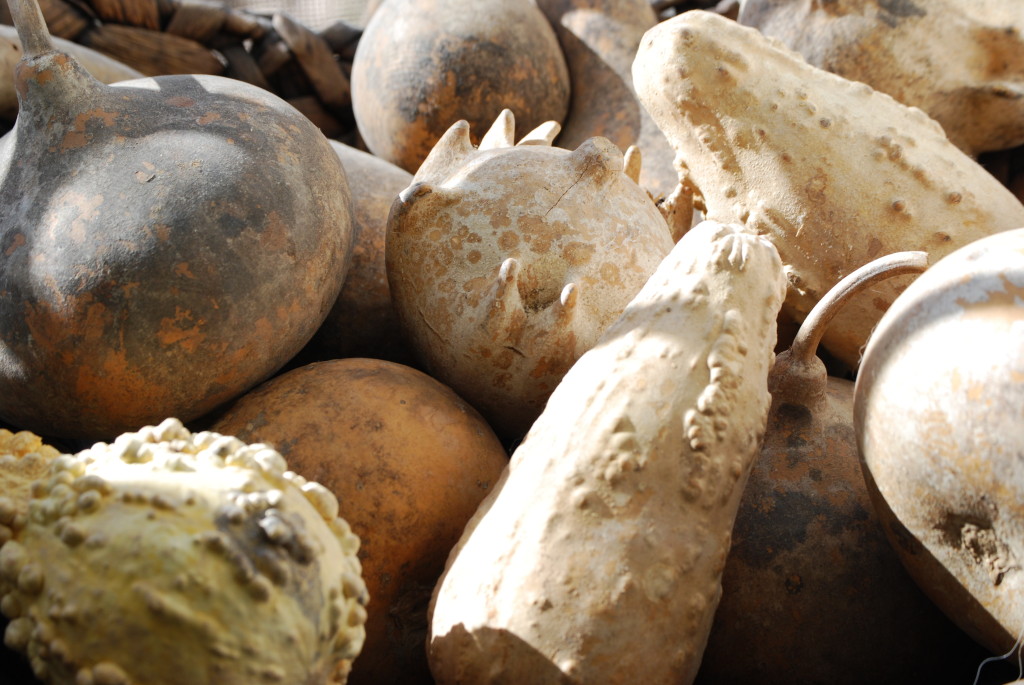
Gourds come in a variety of shapes and sizes – swan neck, apple and pear shapes, gourds with warts and ridges, mini ones, long ones, round ones, and more – providing a myriad of opportunities for sensory exploration. Shake them and you can hear the seeds rattle inside. Start your own GPO – er, Gourd Percussion Orchestra. I keep a variety of gourds in stock and bring them out every year to explore with clients. Compare them to “green” gourds (if available), pumpkins, and squash. Show off pictures and samples of gourd art created by professional artists. Discuss their historical use – did you know that loofah sponges actually come from a gourd? (I thought they came from the sea.)
Other gourd uses to consider, besides your snowman:
– Make snowman ornaments out of mini gourds.
– Embellish miniature egg shaped gourds as holiday ornaments with other themes.
– Paint self portraits onto gourds and create your own gourd “family.”
– Drill a hole, clean the gourd’s interior, decorate the exterior, attach a twine hanger, and hang as a birdhouse.
Contraindications
Beware of mold that can form on the gourd’s exterior during the drying process. Though the mold can actually imprint an interesting pattern on the outside of the gourd, you may need to clean gourds thoroughly before taking them to work with clients. Make sure to store gourds in a well ventilated, dry area. (I store mine in stacking bulb crates.)
Take care when handling the drill and hair dryer. Set up a station where participants go to someone approved to handle the drill and/or hair dryer on their gourds.
Program Notes
The hair dryer will not speed up the drying time for 3-D paint. That, my friend, takes at least one day to dry. So if you use 3-D paint, make sure to place the snowman in a safe place to dry overnight – and make sure the gourd lays flat so the paint doesn’t run. (Don’t wait, like I did, until the day of a program to create your sample gourd, with 3-D paint, for show and tell. I drove the entire way to the program location, holding my gourd in one hand and driving with the other. I got there successfully, then interested participants started passing around the ‘wet’ gourd and well, you know…)
It may be necessary to clean and prepare gourds for craft work ahead of time, especially if you have gourds that haven’t been “finished” and are dirty. The gourd cleaning process can be done as a standalone program, in preparation for the program when the gourds will ultimately be decorated. If this is the case, follow these steps:
Vessel, such as dishtub or clean bucket
Water
Something to weigh down the gourds as they soak
Pot scrubbing brush works best. Also try sponges with abrasive pad on one side.
Safety gear, including a dust mask respirator and medical or dish gloves
Soak gourds, completely submersed, in water for about 10 minutes. Then use scrubbing brush or sponge to scrub along the gourd’s exterior. Allow to dry completely. (Instructions adapted from Welburn Gourd Farm.)
Budget Buster Tips
If doing this activity with a group, you can take adult-sized black socks and cut them in half to save on costs. After applying the sock hat onto the top of the snowman’s head, tie a small piece of string, twine, or ribbon to the floppy end of the sock, about one quarter the way down from the floppy end.
You might be able to find dried gourds online on clearance, just after Christmas and into January. Check out Welburn Gourd Farm or Amish Gourds for online purchasing. You can also trying growing your own gourds from seed, if you have the space in your garden.

